Red Velvet Cheesecake Bites Recipe
My husband thinks I’m absolutely crazy for already planning next Halloween’s treats in August, but I learned my lesson last year. October 30th rolled around and I still hadn’t figured out what to bring to our neighborhood Halloween party. I ended up frantically buying store-bought cookies at 9 PM, which my husband will never let me forget.
“Remember last year when you panicked and bought those sad sugar cookies?” he teased me yesterday when he caught me scrolling through Halloween dessert recipes. “Maybe we should start planning early this time.”
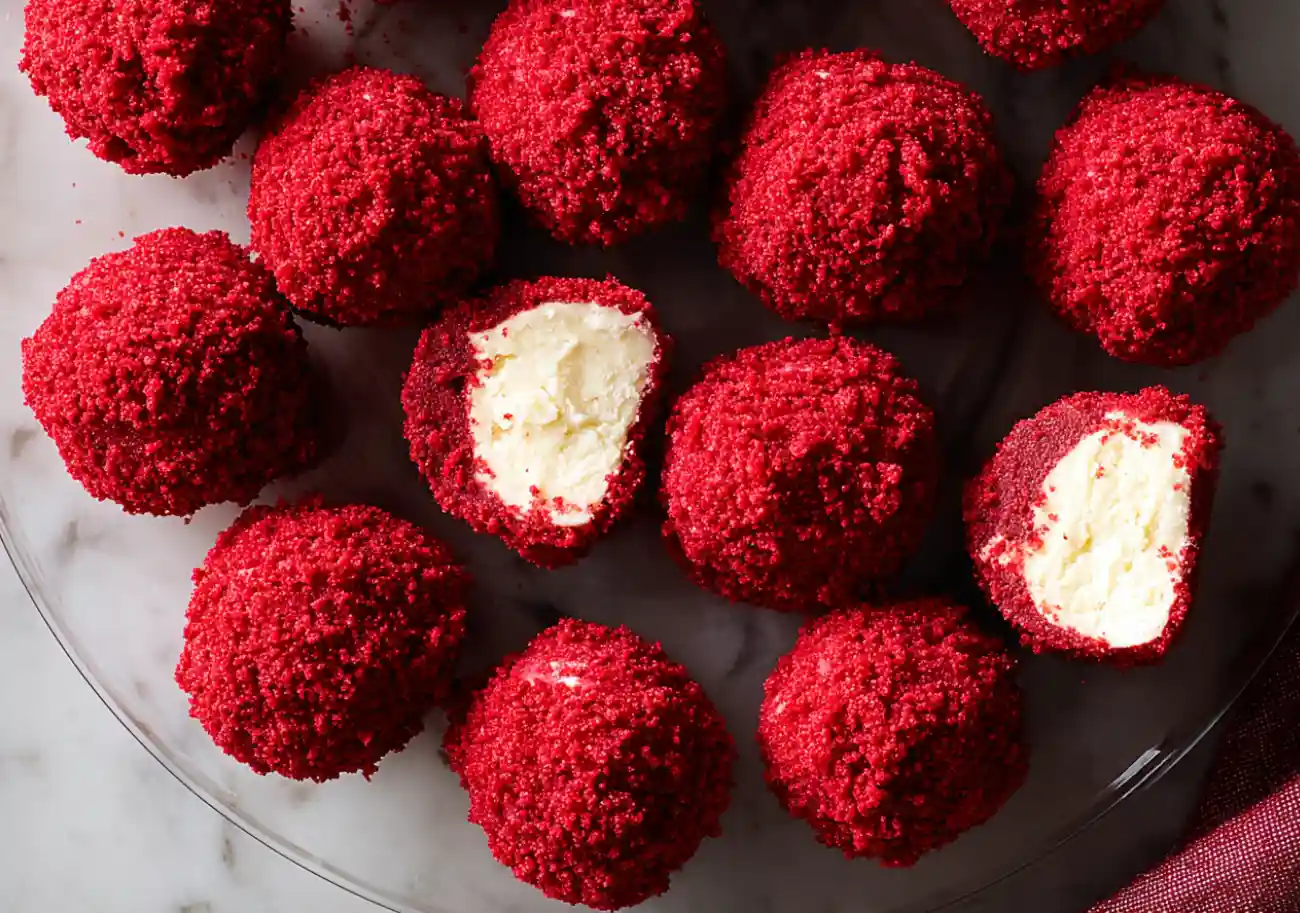
That’s when I found these red velvet cheesecake bites, and I knew I’d struck gold. They’re perfectly bite-sized for parties, that gorgeous red color screams Halloween, and they look fancy enough to make people think I spent hours in the kitchen when really they’re surprisingly simple.
I decided to do a test run this weekend, and my husband was my very willing taste-tester. After his third bite, he looked at me and said, “Okay, you’ve officially redeemed yourself from last year’s cookie disaster. These are incredible.”
The best part? They can be made ahead and frozen, which means no more last-minute grocery store runs. My husband’s already declared himself my official quality control tester for all future Halloween treat experiments, and honestly, I’m not complaining about having such an enthusiastic helper in my early Halloween planning.
| TOTLA TIME |
|---|
| 2 hrs |
What Are Red Velvet Cheesecake Bites?
Red Velvet Cheesecake Bites are small, bite-sized treats made by rolling a sweet cream cheese filling into balls and coating them with red velvet cake crumbs. They look fancy but are actually very simple to put together, which makes them great for parties or holidays when you want something eye-catching without a lot of work. The cake mix bakes up into soft cupcakes, and part of it is crumbled to cover the creamy cheesecake center. The result is a little dessert you can pick up with your fingers, no fork needed, and they’re easy to make ahead and store.
Key Ingredients in Red Velvet Cheesecake Bites
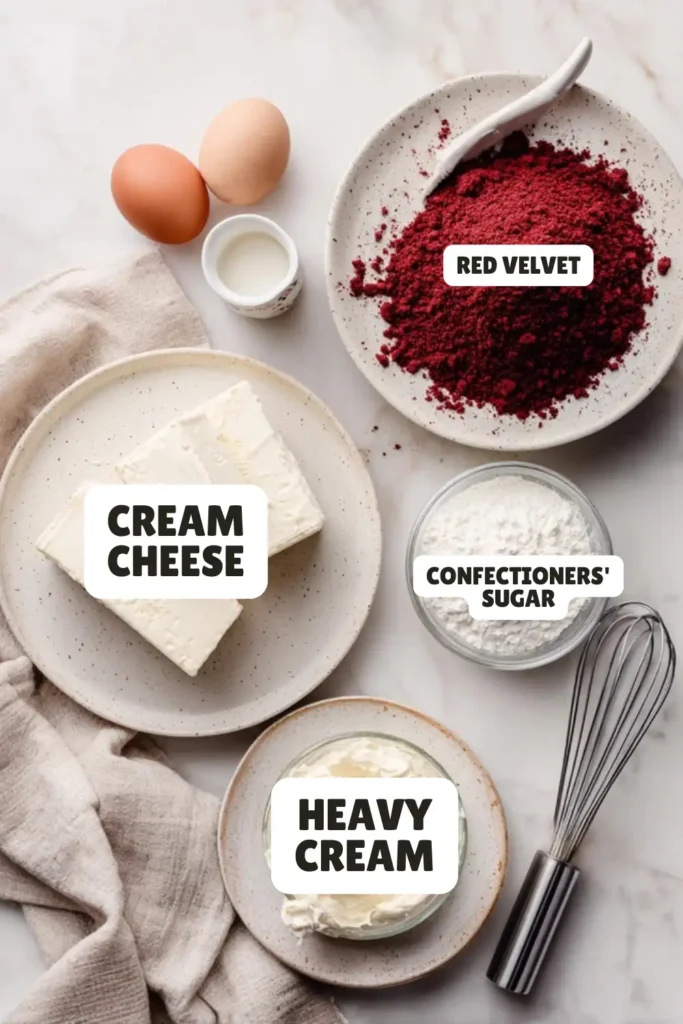
- Red velvet cake mix – the base for baking and crumbs
- Eggs, oil, and water – as called for on the cake mix box
- Cream cheese – softened for the creamy filling
- Confectioners’ sugar – sweetens and lightens the cheesecake mixture
- Heavy cream – adds smoothness and structure
- Vanilla extract – for flavor in the filling
Tips for Perfect Red Velvet Cheesecake Bites
- Bake the cake fully so the crumbs are dry enough to coat the cheesecake balls.
- Let cupcakes cool completely before crumbling, or the crumbs will clump.
- Whip the filling well until smooth and fluffy for the best texture.
- Chill the cheesecake balls before rolling so they hold their shape.
- Use a small cookie scoop for even, bite-sized portions.
- Roll gently in crumbs so the coating sticks without crushing the filling.
- Keep them cold until serving for the neatest presentation.
Kitchen Equipment Needed
- 12-cup muffin pan – for baking the red velvet cupcakes
- Paper liners – to line the muffin pan
- Mixing bowls – one for cake batter, one for the filling
- Handheld or stand mixer – to whip the cream cheese mixture
- Measuring cups and spoons – for accuracy with ingredients
- Spatula – for mixing and scraping bowls
- Cookie scoop – to portion the cheesecake balls evenly
- Baking sheet – to hold the cheesecake bites while chilling
- Parchment paper – to keep bites from sticking
- Cooling rack – to cool cupcakes before crumbling
What to Serve with Red Velvet Cheesecake Bites
I love serving Red Velvet Cheesecake Bites as part of a little dessert spread so everyone can pick and choose. They go nicely with a tray of chocolate-dipped strawberries or even small bowls of fresh berries for something light. If I’m hosting a party, I’ll pair them with mini brownies or sugar cookies so there’s a mix of flavors and textures. For drinks, coffee or hot cocoa makes them feel extra cozy, while a simple sparkling punch or flavored lemonade keeps it fun for kids. These bites look so pretty on a platter that they often steal the spotlight.
Variations and Substitutions
- Different cake mix – use chocolate, strawberry, or vanilla instead of red velvet.
- Flavored filling – add lemon zest, almond extract, or cocoa powder to the cream cheese mixture.
- Coating swap – roll in cookie crumbs, crushed Oreos, or graham crackers instead of cake crumbs.
- Add-ins – mix mini chocolate chips or sprinkles into the cheesecake filling.
- Topping twist – drizzle with melted chocolate or white chocolate for an extra touch.
- Dairy-free option – use dairy-free cream cheese and coconut cream in place of regular cream cheese and heavy cream.
How to Store Red Velvet Cheesecake Bites Properly
To store Red Velvet Cheesecake Bites properly, place them in a single layer on a parchment-lined tray and let them chill in the fridge until firm. Once set, transfer them to an airtight container, stacking with parchment paper between layers so they don’t stick together. They’ll keep well in the refrigerator for up to five days. If you’d like to save them longer, freeze the bites on a tray first, then move them into a freezer-safe bag or container. They can be frozen for up to two months. When ready to serve, thaw them in the fridge until softened.
Frequently Asked Questions
Can I make them ahead of time?
Yes, they can be made a day or two in advance and kept chilled until serving.
Can I freeze cheesecake bites?
Absolutely. Freeze them in a single layer first, then store in a freezer-safe container for up to two months.
Do I have to use red velvet cake mix?
No, you can swap it for chocolate, vanilla, or even funfetti cake mix.
How do I keep them from sticking together?
Layer parchment paper between them in the container.
Can I serve them without chilling?
They hold their shape best when cold, so it’s best to serve them chilled.
Don’t Miss More Recipes
Ingredients
Adjust Servings
| 1 (15.25-0z.) box red velvet cake mix, plus ingredients called for on box | |
| 2 (8-oz.) blocks cream cheese, softened | |
| 3/4 cup confectioners' sugar | |
| 2 Tbsp. heavy cream | |
| 1 tsp. pure vanilla extract |






Leave a Reply