
Candy Corn Cookies Recipe
30/08/2025

My daughter has been absolutely obsessed with candy corn since she was five years old. While other kids fight over chocolate bars in their Halloween haul, she’s the one digging through her trick-or-treat bag looking for those little triangular treats. “More candy corn, Mom!” she’d squeal every October, like she’d discovered buried treasure.
Last year, I was browsing Pinterest for Halloween party ideas when I stumbled across these adorable candy corn cookies. The moment I saw them, I knew I had to try making them for my candy corn-loving girl. They looked just like the real thing – that perfect yellow, orange, and white layering that makes candy corn so recognizable.
When I surprised her with a batch fresh from the oven, her face absolutely lit up. “Mom! They look just like real candy corn but they’re COOKIES!” She carefully examined each one, marveling at how I’d managed to get the colors so perfect. Then she took a bite and did this little happy dance in the kitchen that made all the effort totally worth it.
What I didn’t expect was how much she’d want to help make them. Now every October, she stands on her little step stool next to me, carefully helping roll the dough and arrange the colored layers. “Are we making my special cookies today?” she’ll ask hopefully starting in September.
My husband jokes that I’ve created a monster, but watching her carefully place each cookie on the baking sheet with such concentration and pride makes my heart melt every time. These candy corn cookies have become our special October tradition, and honestly, seeing her excitement over something I made just for her is the sweetest Halloween treat of all.
| COOK TIME | TOTLA TIME |
|---|---|
| 10 minutes | 45 minutes |
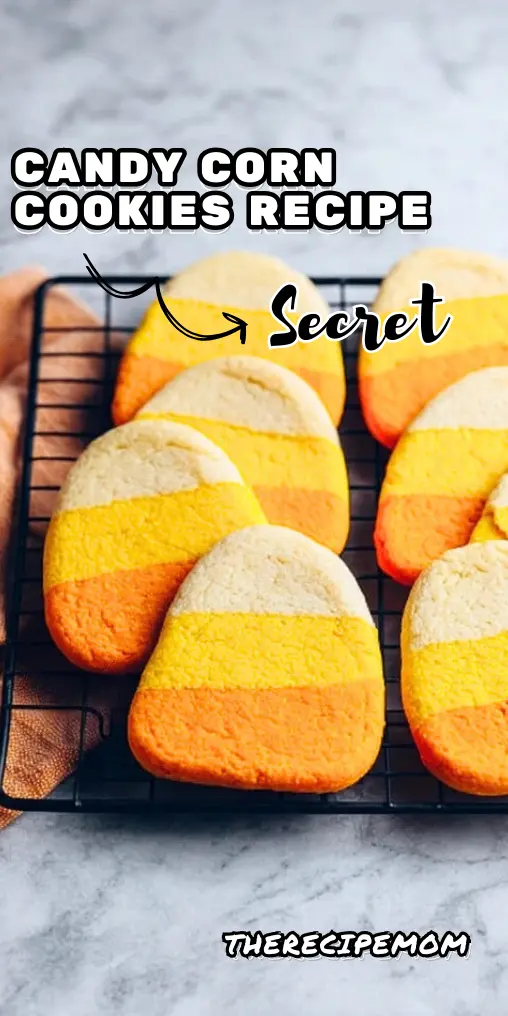
What Are Candy Corn Cookies?
Candy Corn Cookies are a playful way to bring Halloween to life in the kitchen. They’re simple sugar cookies, but what makes them special is the way the dough is colored and layered to look just like real candy corn. You make one batch of dough, divide it into three parts, and tint each section yellow, orange, and white. After shaping and chilling, the dough is sliced into neat little triangles that bake into cookies with the same stripes as the candy. They’re festive, fun to make with kids, and add a cheerful touch to any October gathering.
Why You’ll Love Candy Corn Cookies
The reason I love making Candy Corn Cookies is that they feel more like a tradition than just another dessert. The bright layers of yellow, orange, and white always bring out excitement, especially from kids who think they’re holding candy corn in cookie form. They’re simple to prepare, but the final result looks like something that took hours to create. What makes them even better is how much fun it is to involve little helpers in rolling, layering, and cutting the dough. These cookies turn an ordinary baking day into a sweet memory that everyone looks forward to each year.
Key Ingredients in This Candy Corn Cookies
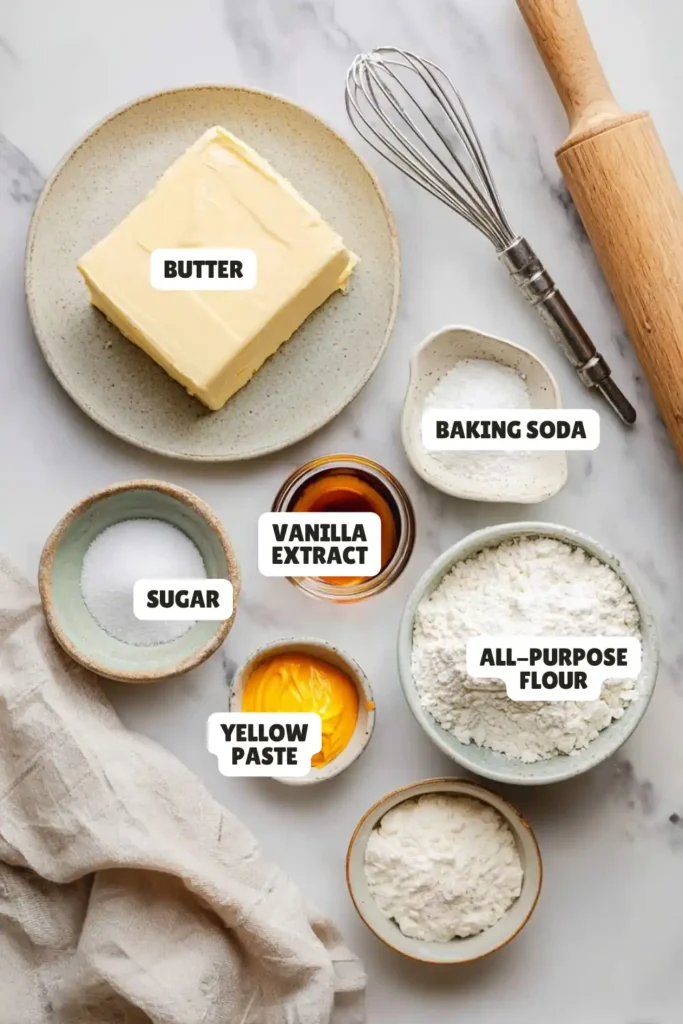
- Butter – softened for creaming the dough
- Sugar – to sweeten and give structure
- Vanilla extract – adds a simple flavor base
- All-purpose flour – the main dry ingredient for the dough
- Baking soda – helps the cookies rise slightly
- Salt – balances the sweetness
- Yellow and orange paste food coloring – creates the candy corn layers
Tips for Making Perfect Candy Corn Cookies
- Cream butter and sugar well until light and fluffy for the best texture.
- Divide the dough evenly so each color layer looks neat when sliced.
- Use paste or gel food coloring for brighter colors without changing dough consistency.
- Shape the logs carefully with angled sides to mimic candy corn’s triangle shape.
- Chill the dough thoroughly (at least 4 hours) so it slices cleanly.
- Cut even slices about ¼ inch thick for cookies that bake evenly.
- Cool on wire racks right after baking to keep them crisp.
Kitchen Equipment Needed
- Mixing bowls – for creaming butter and sugar and combining dry ingredients
- Hand mixer or stand mixer – to beat the dough until fluffy
- Measuring cups and spoons – to keep ingredient amounts accurate
- Rubber spatula – for folding and scraping the dough
- Plastic wrap – to wrap and chill the dough logs
- Sharp knife – to slice the chilled dough into even cookies
- Baking sheets – for baking the cookies
- Wire racks – to cool the cookies evenly after baking
What to Serve with Candy Corn Cookies
The fun of serving Candy Corn Cookies is that they fit right into any Halloween spread. I like putting them on a platter with other seasonal treats like caramel apples or popcorn balls, which makes the table feel festive without much extra work. They also go really well with warm drinks—hot chocolate, apple cider, or even a pumpkin spice latte for the grown-ups. If I’m serving them at a party, I’ll sometimes add bowls of candy corn alongside just for fun. These cookies bring a playful touch, and they always end up being the first thing people reach for.
Variations and Substitutions
- Flavor twist – add almond extract or citrus zest instead of vanilla.
- Color swap – use pastel shades for spring or red and green for Christmas.
- Dough base – use a shortbread or sugar cookie recipe if you prefer a different texture.
- Gluten-free option – replace all-purpose flour with a gluten-free flour blend.
- Icing drizzle – add a thin glaze or melted white chocolate over the top.
- Mini cookies – shape smaller logs for bite-sized treats.
- Sprinkle addition – roll the edges in sanding sugar or sprinkles before baking.
How to Store Candy Corn Cookies
The easiest way to keep Candy Corn Cookies fresh is to store them properly right after baking. Once they’ve cooled, I place them in an airtight container with a sheet of parchment paper between layers so they don’t stick together. They stay good at room temperature for about a week, which makes them perfect for parties or school lunches. If I want to make them ahead, I freeze the baked cookies in freezer bags for up to two months. When I’m ready to serve, I just let them thaw on the counter, and they taste just as good as fresh.
Frequently Asked Questions
Can I make the dough ahead of time?
Yes, the dough can be wrapped and chilled for up to two days before baking.
Can I freeze Candy Corn Cookies?
Absolutely—bake them first, then freeze in freezer bags for up to two months.
Do I need special food coloring?
Gel or paste food coloring works best since it gives bright colors without thinning the dough.
How do I keep the layers neat?
Chill the dough logs well before slicing to keep the stripes clean.
Can I use a different cookie dough base?
Yes, shortbread or sugar cookie dough both work well for this recipe.
Don’t Miss More Recipes
Ingredients
Adjust Servings
| 1-1/2 cups butter, softened | |
| 1-1/2 cups sugar | |
| 1/2 teaspoon vanilla extract | |
| 3 cups all-purpose flour | |
| 1 teaspoon baking soda | |
| 1/2 teaspoon salt | |
| Yellow and orange paste food coloring |
Nutritional Information
Directions
Step 1
Step 2
Step 3
Step 4
Step 5

Leave a Reply