


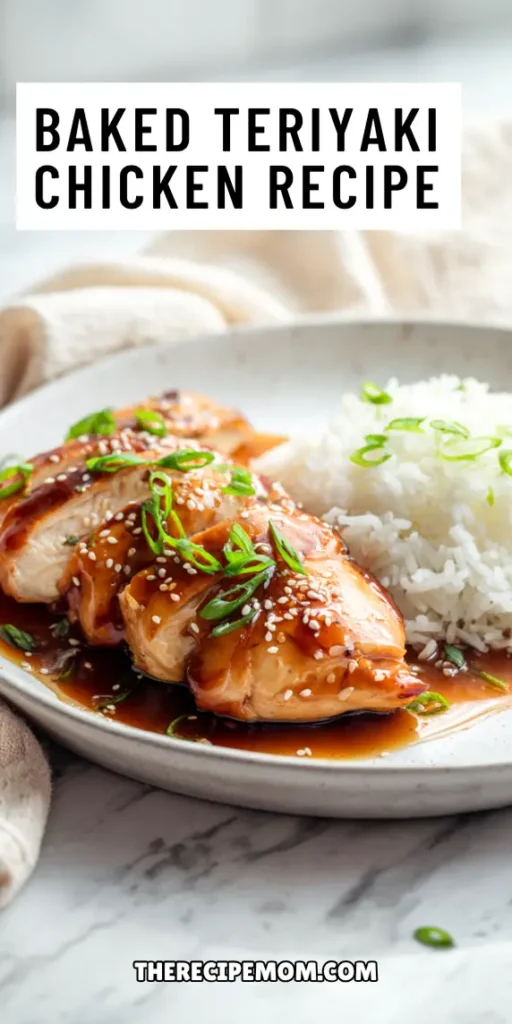
Baked Teriyaki Chicken Perfect for Busy Nights
08/08/2025
Wednesday nights used to be absolutely chaotic in our house. Between after-school activities, homework deadlines, and everyone arriving home at different times, dinnertime felt more like a logistics nightmare than a family meal. I found myself ordering takeout way more often than I wanted to admit, especially from this little teriyaki place that everyone loved but was getting expensive for our weekly routine.
One particularly hectic evening, I was staring at chicken thighs in my fridge and realized I had most of the ingredients to make something similar at home. I had soy sauce, honey, garlic – basically everything that made those takeout orders so addictive. The question was whether I could turn those ingredients into something that would satisfy everyone without adding more stress to my already overwhelming day.
That’s when I discovered the magic of just throwing everything into a baking dish and letting the oven do the work. No standing over the stove, no constant stirring or monitoring – just mix up a simple teriyaki glaze, pour it over the chicken, and slide it into the oven while I helped with homework or folded laundry.
The first time I tried this approach, I was amazed at how hands-off it was and how incredible the kitchen smelled while it was cooking. When I pulled it out forty minutes later, the chicken was perfectly glazed and tender, with this beautiful caramelized coating that looked just like what we’d been ordering from the restaurant.
| COOK TIME | TOTLA TIME |
|---|---|
| 25 minutes | 30 minutes |
What Is Baked Teriyaki Chicken?
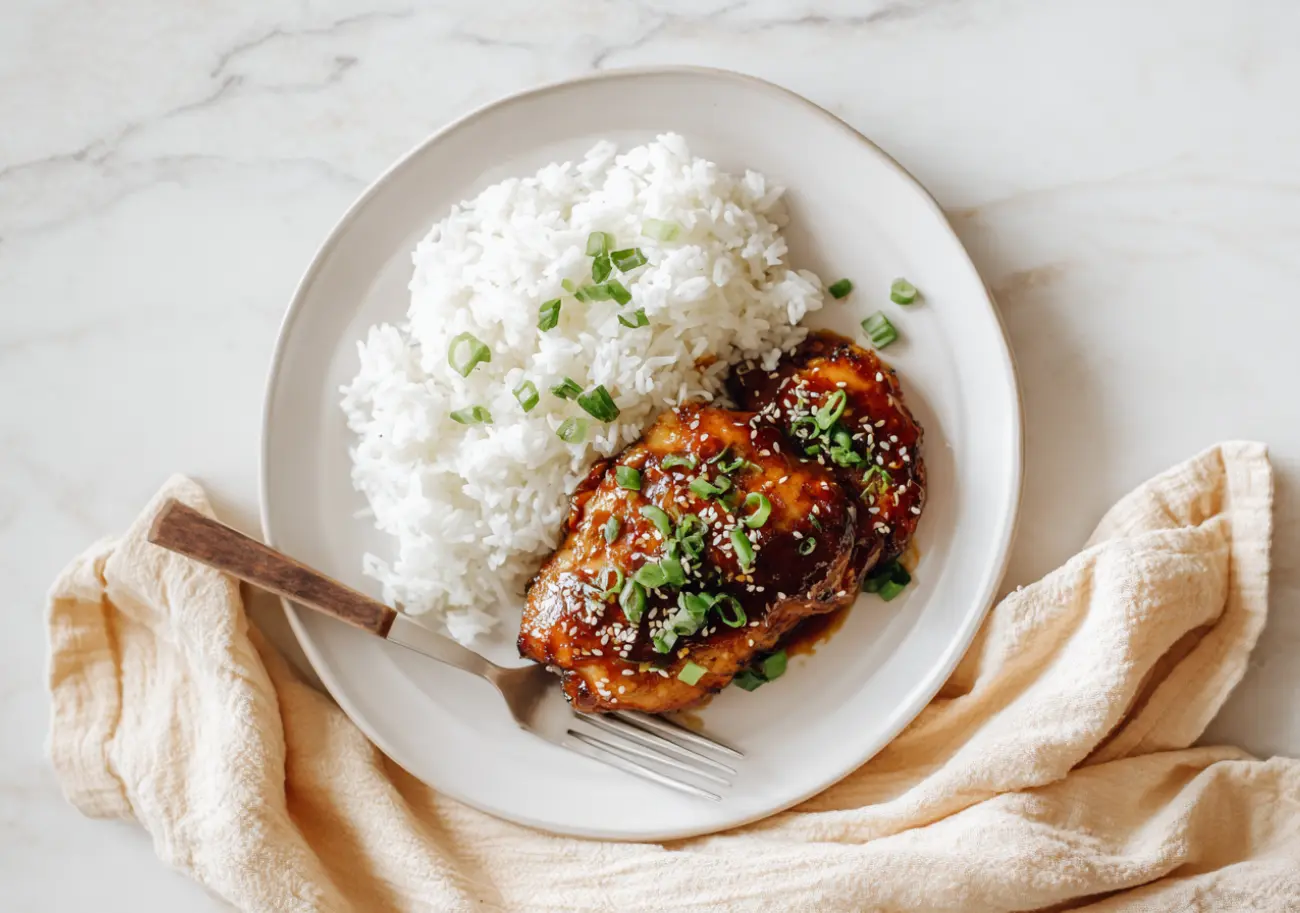
Baked teriyaki chicken is tender chicken breasts coated in a sweet and savory homemade teriyaki sauce, then baked until perfectly cooked through. The sauce combines soy sauce, rice vinegar, sugar, and aromatic spices like ginger and garlic to create that classic teriyaki flavor we all crave. What makes this version special is that it’s baked in the oven instead of pan-fried, making it healthier and so much easier to prepare. The sauce thickens beautifully as it bakes, creating a glossy glaze that clings to every piece of chicken. It delivers all the delicious flavors of restaurant-style teriyaki chicken right from your own kitchen. This dish is perfect served over steamed rice with some green onions sprinkled on top for a complete, satisfying meal that the whole family will love.
Why This Teriyaki Chicken Recipe Is Perfect for Busy Nights
This teriyaki chicken recipe is a total lifesaver when you’re running around like crazy and still need to get a good dinner on the table. The beauty of this dish is that it requires minimal hands-on time – you just mix up the sauce, pour it over the chicken, and let the oven do all the work while you handle everything else on your to-do list. There’s no standing over the stove stirring or flipping, which means you can help with homework, throw in a load of laundry, or just take a quick breather. The ingredients are simple and most of them are pantry staples you probably already have at home. Plus, it cooks in just 25-30 minutes, so even on those nights when dinner feels impossible, you can have something delicious and homemade ready in under an hour. It’s real food for real busy lives.
Key Ingredients in Baked Breaded Chicken
- Boneless, skinless chicken breasts – lean, tender, and perfect for baking
- Olive oil – adds moisture and helps the coating stick
- Minced garlic – gives a rich, savory base flavor
- Paprika – adds warmth and a golden color
- Italian breadcrumbs – seasoned for extra taste in every bite
- Panko breadcrumbs – light and airy for maximum crunch
- Fresh grated Parmesan cheese – nutty, salty, and helps the crust crisp up
- Dried basil & oregano – classic Italian herbs for aroma and depth
- Onion powder – subtle sweetness that balances the savory flavors
- Black pepper & salt – brings all the flavors together
How to Make Homemade Teriyaki Sauce
Making homemade teriyaki sauce is surprisingly simple and tastes so much better than anything from a bottle. You start by combining soy sauce, water, rice vinegar, sugar, ground ginger, red pepper flakes, and minced garlic in a saucepan over high heat. Once everything comes to a boil, you create a quick slurry by whisking together the remaining soy sauce with cornstarch until it’s completely smooth. This little trick is what makes the sauce thick and glossy instead of thin and watery. You stir the cornstarch mixture into the boiling sauce and let it bubble for just a minute or two until it coats the back of a spoon perfectly. The final touch is stirring in sesame seeds for that authentic flavor and a little crunch. The whole process takes less than ten minutes, and you’ll have a rich, flavorful sauce that’s free from preservatives and way more delicious than store-bought.
Tips for Making the Best Baked Breaded Chicken
- Pat the chicken dry first – this helps the coating stick better and bake up nice and crisp.
- Pound the chicken to even thickness – so it cooks evenly without drying out.
- Mix Italian breadcrumbs with panko – the Italian crumbs bring flavor, and the panko adds extra crunch.
- Use freshly grated Parmesan – it melts beautifully into the crust for a richer taste.
- Press the coating onto the chicken – don’t just dip; press it in so it really sticks.
- Bake on a wire rack if possible – it keeps air circulating, so the bottom stays crispy too.
- Avoid overcrowding the pan – giving each piece space helps it brown instead of steam.
- Let the chicken rest for a few minutes – this keeps the juices in and the meat tender.
Kitchen Equipment Needed
- Baking dish (9×13-inch) – to fit the chicken in a single layer
- Mixing bowls or pie tins – one for the breadcrumb mixture, one for the oil mixture
- Tongs or clean hands – for dipping and coating the chicken evenly
- Measuring cups & spoons – to get the seasoning and breadcrumb mix just right
- Grater or microplane – for freshly grating Parmesan cheese
- Oven-safe wire rack (optional) – helps keep the bottom crispy while baking
- Meat thermometer – to check that the chicken is perfectly cooked (165°F / 74°C)
- Parchment paper or foil – for easy cleanup and less sticking
What I Like to Serve with Teriyaki Chicken
Fluffy jasmine rice is absolutely perfect with this teriyaki chicken because it catches every drop of that amazing sauce. I also love serving it over brown rice when I want something a little heartier and more nutritious. For vegetables, roasted asparagus or sautéed bok choy add such a nice contrast to the sweet chicken. Sometimes I’ll make a quick stir-fry with bell peppers, carrots, and snow peas for extra color and crunch. Steamed edamame on the side makes it feel like a complete Asian-inspired meal that everyone enjoys. If I want to switch things up, I’ll serve the chicken over crispy lettuce cups for a lighter option, or even toss it with cooked noodles for a teriyaki chicken noodle bowl. A simple side salad with sesame dressing rounds everything out nicely. The best part is how flexible this chicken is – it works with so many different sides depending on what you’re craving.
Variations and Substitutions
- Swap chicken breasts for thighs or tenders – thighs stay extra juicy, and tenders cook faster.
- Go all Parmesan – skip the breadcrumbs and use only cheese for a rich, low-carb crust.
- No panko? – use all Italian breadcrumbs, or crush cornflakes for a fun crunch.
- Change up the herbs – try thyme, rosemary, or parsley instead of basil and oregano.
- Add spice – mix in cayenne pepper or chili flakes for a little heat.
- Make it gluten-free – use gluten-free breadcrumbs or crushed rice crackers.
- Try different cheese – swap Parmesan for Asiago, Romano, or a dairy-free option.
- Air fry instead of bake – perfect for an even crispier finish in less time.
How to Store Teriyaki Chicken
toring this teriyaki chicken is super easy and it actually tastes even better the next day after all those flavors have had time to meld together. Once the chicken has cooled completely, I transfer it to an airtight container and pop it in the refrigerator where it stays fresh for up to four days. Make sure to store any leftover sauce separately or drizzle it over the chicken before sealing the container. For longer storage, you can freeze the cooked chicken for up to three months – just wrap it tightly in plastic wrap first, then place it in a freezer-safe container. When you’re ready to reheat, the microwave works perfectly for quick portions, or you can warm it gently in a covered skillet over medium heat. If it seems a little dry after reheating, just add a splash of water or a bit of that reserved sauce to bring it back to life. This makes it perfect for meal prep or those nights when you need dinner ready in minutes.
Frequently Asked Questions
Can I use chicken thighs instead of breasts?
Yes! Chicken thighs are naturally juicier and work beautifully with the breading. Just add a few extra minutes to the bake time.
How do I keep the crust from going soggy?
Bake the chicken on a wire rack if you can, and don’t cover it right after baking. This lets air circulate and keeps the coating crisp.
Can I prepare it ahead of time?
You can bread the chicken earlier in the day, store it covered in the fridge, and bake it when ready. Or bake it fully, cool, and reheat later.
Is this recipe freezer-friendly?
Yes — once baked and cooled, wrap each piece well and freeze. Reheat in the oven straight from frozen or after thawing in the fridge.
What’s the best way to reheat leftovers?
The oven or air fryer is best for bringing back that crunch. Bake at 350°F for about 10–12 minutes until hot.
Don’t Miss More Recipes
Ingredients
Adjust Servings
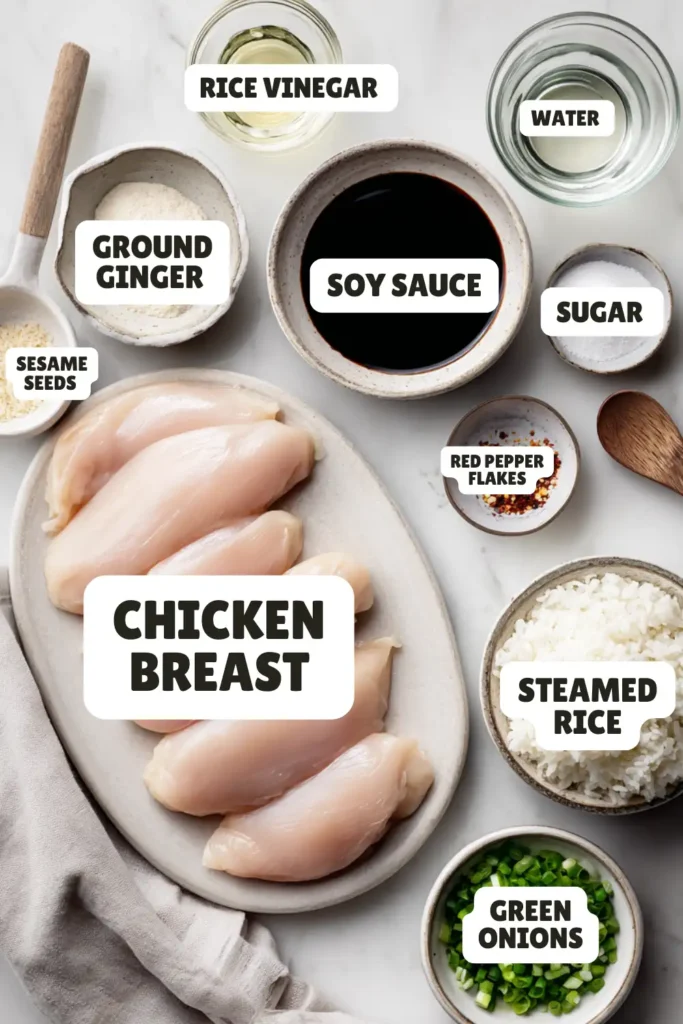
| 4 boneless skinless chicken breasts pounded to even thickness less than 1 inch | |
| 1 ⅓ cup low sodium soy sauce divided | |
| ½ cup water | |
| ½ cup rice vinegar | |
| 1 cup sugar | |
| 1 teaspoon ground ginger | |
| ¼ teaspoon crushed red pepper flakes | |
| 2 teaspoons minced garlic | |
| 3 tablespoons corn starch | |
| ½ teaspoon sesame seeds | |
| chopped green onions and steamed rice, for serving |
Leave a Reply